Dyes
REVIEW/TUTORIAL : Schwarzkopf Brilliance Luminance Intense Permanent Colour Hair Dye (Red Passion)
So as we all know, going for regular salon visits to keep your hair colour on point is really time-consuming, not to mention it'll burn a huge hole in your wallet. (& that can really hurt especially if you have a pretty wallet like I do)
Yeap, thats it! My first ever wallet from #KateSpade
Pretty don't you think? I'm honestly the luckiest girl in the world.
So thankful to have a boyfriend who pampers me all the time and has good taste.
Anyway back to the point of this post.
I don't really like going to salons because I feel like they screw up the colour I want ALOT, therefore I turn to boxed hair dyes. They're not that bad actually, in fact I prefer it over salons.
Schwarzkopf Brilliance Luminance Hair Dye (Red Passion)
These ones from Schwarzkopf are actually for those with dark hair, which is perfect for my really dark asian hair.
This is actually their new formula because they've added in a capsule filled with Diamond Gloss Serum that apparently helps to provide a much more vibrant colour.
I got this for about $12.99 I think? And my hair is at that length where it's not exactly medium but not long as well, so just to be sure, I got two boxes.
This is what you'll find when you open the box:
1. Tube of colour cream
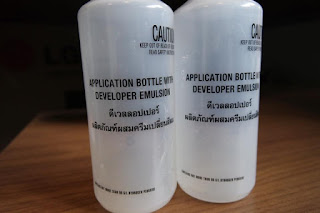
2. Bottle of developer
3. Tube of conditioner
4. Gloves (which I've left out. I don't use them, ever cause it never fits me)
I already have a hair-dye(ing) kit with me which includes the mixing bowl and a brush. It's not necessary but I just think it's easier than using the bottle.
So first, I emptied the developer into the mixing bowl.
Then I added the colour cream. Try to squeeze out as much as you can, because this is what's gonna give it colour.
Added in the gloss serums, and started mixing it and this is the colour I got.
Don't worry, it looks a little light now but it'll get darker and more red after awhile.
Just try your best to get all the hair dye onto every part of your hair.
Separating your hair really helps, and having someone else to do it for you is a big plus.
My boyfriend was having his exams, so I had to go at it, solo.
I left the hair dye in for about 45 minutes, because I know I have really stubborn hair. Then I washed it out and applied the conditioner that was provided in the box.
Before:
| As you can see, my roots are really starting to grow out. It got to the point where I couldn't stand it anymore. |
After:
So that's my hair after I washed it and did a little blow-drying.
My hair is naturally a little frizzy and wavy. I didn't want to curl it or straighten it cause I think that would give you guys a false look on the results.
I always feel betrayed whenever I see amazing results online, and then find out that it just looks great because they curled or straighten it with an iron.
I really really love the results.
The colour is so vibrant and red. And this hair dye doesn't dry out my hair at all, because it feels so soft and smooth.
Definitely going to stick to this one for a really long time, at least till' I can find a better one.
Remember to use heat protectant whenever you're dealing with heat because it really helps in keeping your hair healthy and prevents it from drying out or getting damaged.
Like this NAK Thermal Shield I got in my June Lust Have it beauty box.
Read all about it here:
Also, you've got to use shampoo and conditioner specifically for colour-treated hair or else your red is going to fade like the wind!
Well, I hope you guys liked this review/tutorial.
Till' next time!
Have a nice day everyone.
FINAL VERDICT
Packaging: 7/10
Ease of use: 7/10
Effectiveness: 9/10
Affordability: 7/10
![Audrey For You [OLD]](https://blogger.googleusercontent.com/img/b/R29vZ2xl/AVvXsEi5ovqhI7nwlkDwD8cEXxD-W3owEc-701cpo7nabmA8GgfQLg5dtv74XzTEyqjQWV3PvT1VCm4krkWEjg_fnu-ZEEeJgzHsgdu1GOiW8tuhOSl9BsxGWk21PIiJ3mwltc8pIkPg67YNB237/s1600/WEBSITE+MOVED.jpg)


